Warning: include(/data/htdocs/hebergementweb/sites/imagemed.univ-rennes1.fr/en/nav.html): failed to open stream: No such file or directory in /data/htdocs/hebergementweb/sites/imagemed.univ-rennes1.fr/template.php on line 144
Warning: include(): Failed opening '/data/htdocs/hebergementweb/sites/imagemed.univ-rennes1.fr/en/nav.html' for inclusion (include_path='.:/usr/share/pear:/data/htdocs/hebergementweb/php-include') in /data/htdocs/hebergementweb/sites/imagemed.univ-rennes1.fr/template.php on line 144
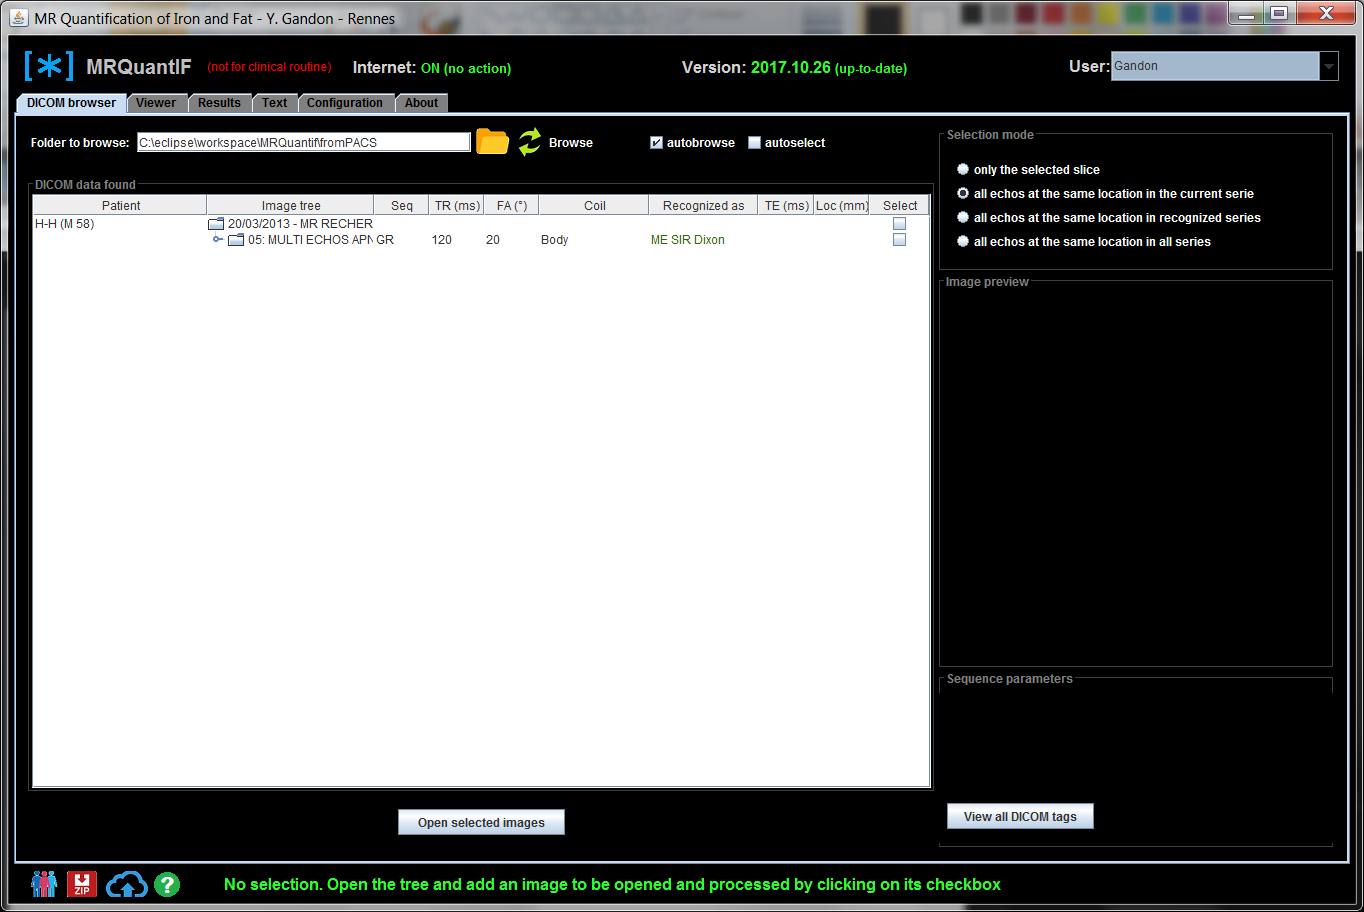
Tab 'DICOM Browser': images selection
This screen displays the list of recognized images in the selected directory with the possibility to select more or less automatically (according to the selection mode defined in the upper part of the right panel) one or more series with a unique location by series. A preview of each image or full access to the DICOM parameters is provided in the right panel. The selected images are opened by simply clicking on the Open selected images button at the bottom of the page.
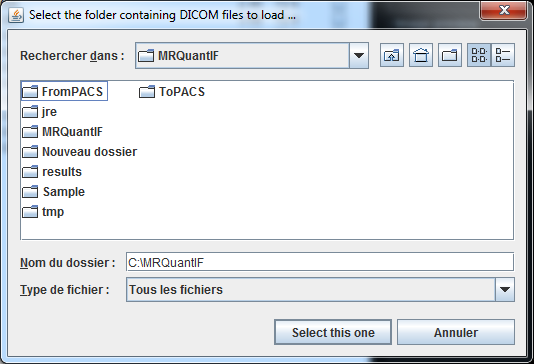
Import Directory Selection
The directory scanned first when launching the software is the fromPACS directory in the installation directory at the same level as the MRQuantIF.jar main file. This PACS import directory can be changed in the Configuration section.
If the import directory of PACS is empty, the software will propose to use the example provided. Otherwise the default directory that is listed in the input field is the last one used.

By clicking on the icon representing a directory you can manually select a directory that contains DICOM images. The subdirectories found will also be analyzed.
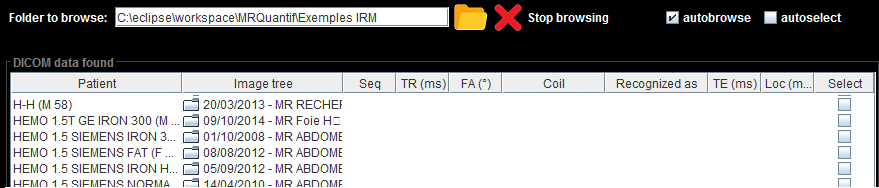
Start the analysis by clicking on the icon representing two rotating arrows in front of browse. The list of studies found is lengthened in real time as the browsing progresses. You can stop the search at any time by clicking on the red cross in front of Stop browsing. The list already created is preserved. A new directory selection also interrupts the analysis.
If the autobrowse check box is selected, the search is performed immediately after selecting the directory without clicking the icon in front of Browse.
If the check box autoselect is selected the visualization is done automatically if there are only images of the same height in all the series and if all the series are recognized, without having to click on the Open selected images button. You can save you preferences In the Configuration page.
List View
To open or close the tree for a study or series just double-click on the icon representing a directory in the Image tree column.
Closed tree:

Opening a study displaying the serial level:

Full opening showing the list of images in the series:

This list is a hierarchical table with the columns:
- Patient displaying the patient's name,
- Image tree showing the hierarchy study/series/images,
- Seq specifying the type of sequence,
- TR (ms) displaying the used TR,
- FA (°) displaying the flip angle used,
- Coil displaying the coil used. If the coil is not recognized a question mark is displayed. You can then manually decide the type of antenna used (Body or Surface) in a drop-down menu that appears when we click on this cell.
- Recognized as displaying information about the recognized sequence and what it allows for analysis:
- ME: calculation of T2 * and potentially of fat fraction (FF) by the Dixon T2 * method and the complex method
- SIR: calculation of the SIR method
- Dixon: calculating Dixon 2 pts and or 3pts
- GRE (out1, in1-6): contribution to the calculation of the SIR method
- T2 * map, R2 * map, FF map: map allowing a direct measurement of T2 * or R2 * or FF
- TE (ms) displaying the TE of each image,
- Loc (mm) showing the height of each image,
- Select displaying a checkbox to select or not an image or deselect a series.
The images are sorted by echo time or by location, which explains why they are not necessarily classified by image number.
Image Information
Clicking on the line of an image displays the corresponding image in the Image preview area to the right of the list. The main acquisition parameters of the chosen image are displayed in the Sequence parameters box just below the image:
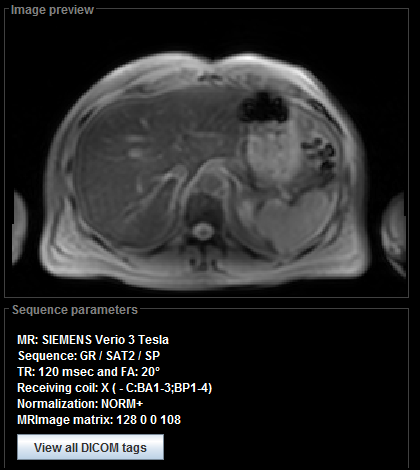
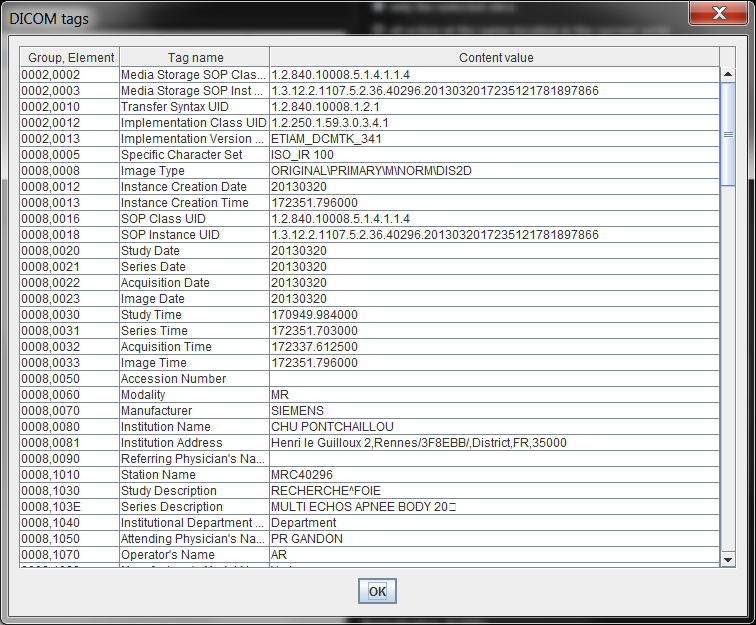
By clicking on the View all DICOM tags button, you can access, in a modal window, the list of all DICOM fields.
Selecting images to analyze
To select one or more images to analyze, simply click on the corresponding checkbox in the Select column. The selection can propagate automatically to images of the same height of the same series or several seres, depending on the selection mode defined.
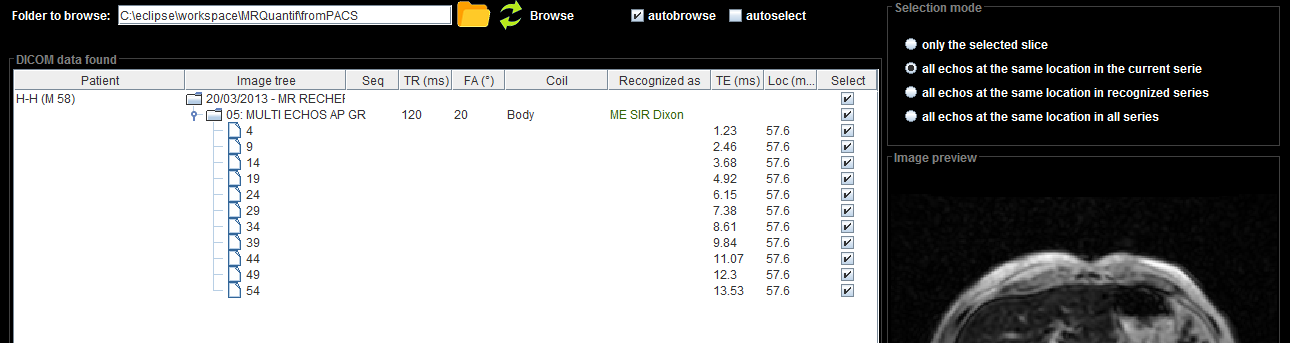
The selection propagation mode is chosen in the Selection mode area at the top right of the screen:
- only the slice checked,
- either all the echoes of the same location within the same series as the checked image,
- all echoes of the same location of only recognized series,
- all the echoes of the same location of all the series listed.
The boxes of the selected images (and series) are checked.
The total is displayed in the help area:

You can deselect a series by unchecking the box at the serial line. You can deselect all series by unchecking the box at the study line.
The Zip button in the box at the bottom of the screen allows you to create a zip file containing the selected and anonymized images. This zip file can be sent by e-mail without risk of loss of confidentiality.
At the end of the selection, a simple click on the Open selected images button opens the viewer and moves to the Viewer tab.

This action also results in the background export of the selected anonymized images to the internet server provided that the internet is "on", that this option is checked in the Configuration section and that the current user has a valid email declared.